
How to Make a Magic Ring in Crochet (Explained Like a Human)
Magic rings show up in every pattern that works in the round, and if you don’t already know how to make one, you’re just stuck there at step one while the pattern assumes this is something everyone learns by osmosis.
It’s not complicated. A magic ring is how you start round projects without leaving a hole in the center. You make a loop, crochet into it, then pull the whole thing tight. That’s it.
But the instructions always make it sound like you need a PhD in yarn physics and 7-10 years of crochet experience to figure it out. It’s really not that serious, and this tutorial is going to walk you through it step by step with pictures. And I also made a video because sometimes you just need to watch things in real time (but have a pause button option) to pick it up.
Let’s get into it.
Panicking about starting crochet? I was there and I see you.
I made a free guide for anxious beginners who need someone to talk them off the ledge before Row 1. No nonsense, no “believe in yourself” speeches. Just the actual things you need to know so you don’t spiral at 2am wondering if you’re doing it wrong. (Spoiler alert: you’re not) Grab the Don’t Panic PDF
Heads up: My posts may contain affiliate links! If you buy something through one of those links, you won’t pay a penny more, but I’ll get a small commission, which helps keep the lights on! Thanks!
How to Make a Magic Ring
What you need:
Hook – Whatever hook the pattern calls for, or your emotional support hook.
Yarn – Again, whatever yarn you’re needing for the project. (Or if you’re just practicing, use worsted weight (#4 ) yarn. It’s the most beginner friendly.
To Begin:
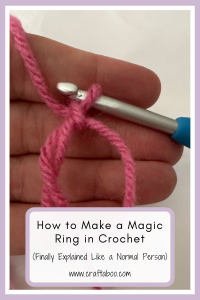
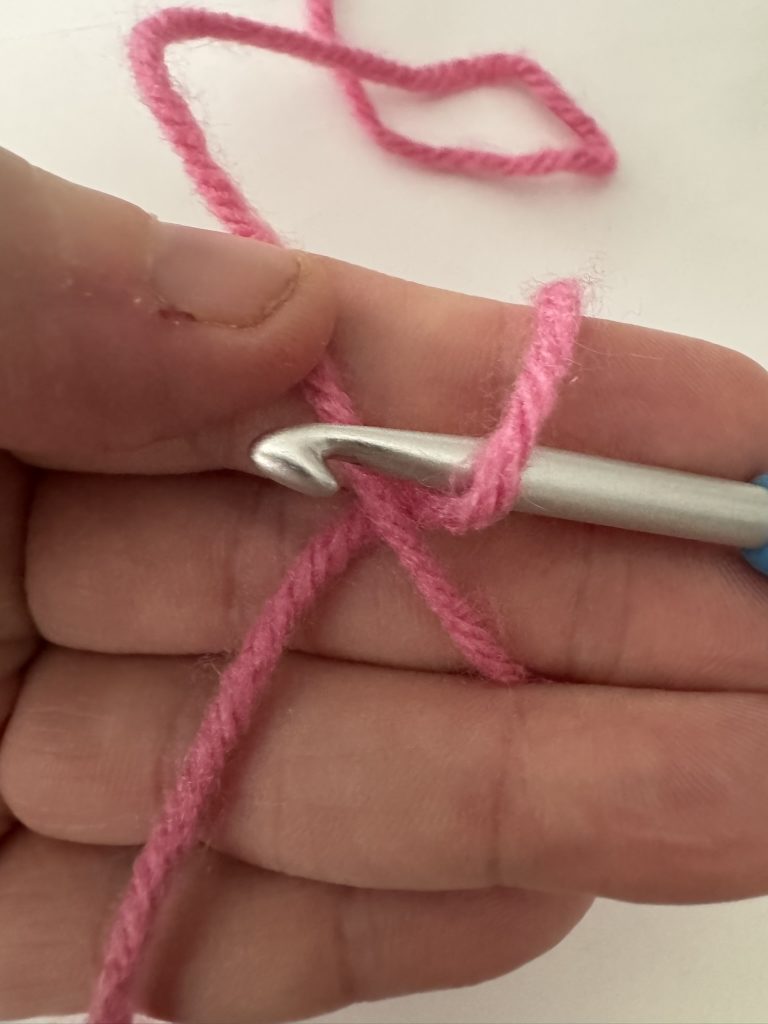
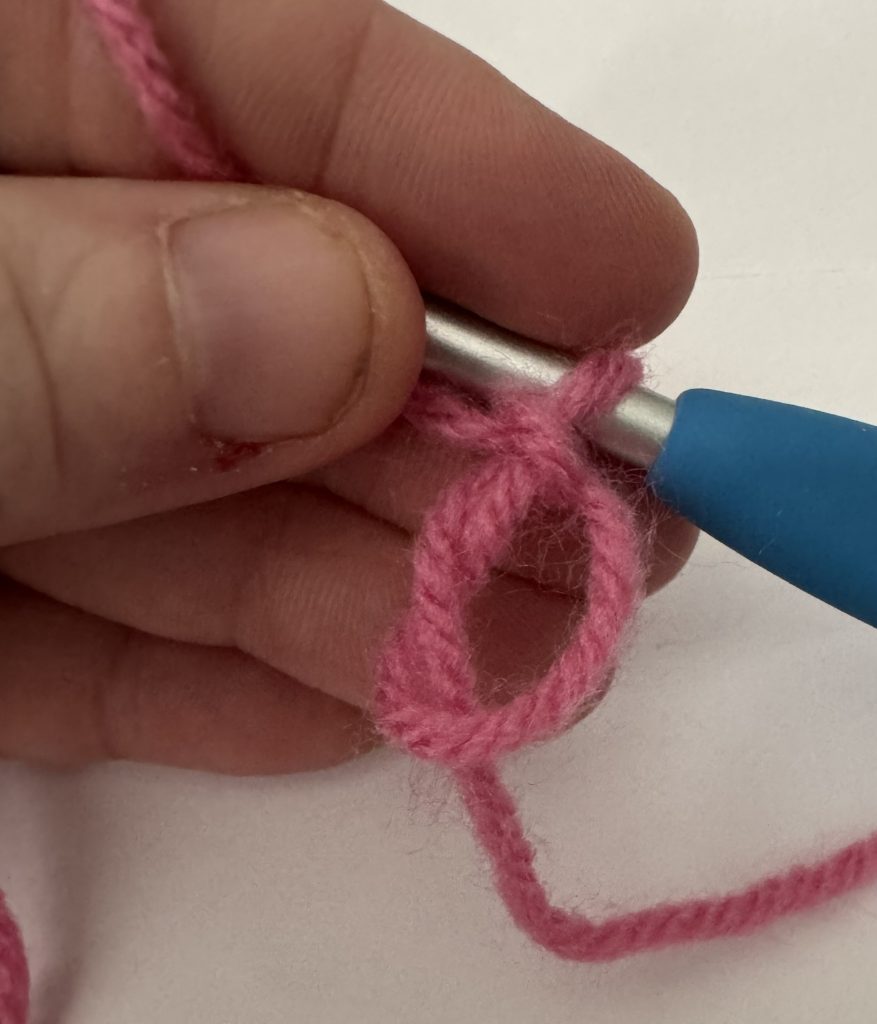
You’re going to start by wrapping the yarn around your fingers and forming a cross or an X. Place your finger on that X to keep everything in place.

Next, insert your hook under the bottom strand of yarn. Grab the top strand with the hook and pull up a loop.
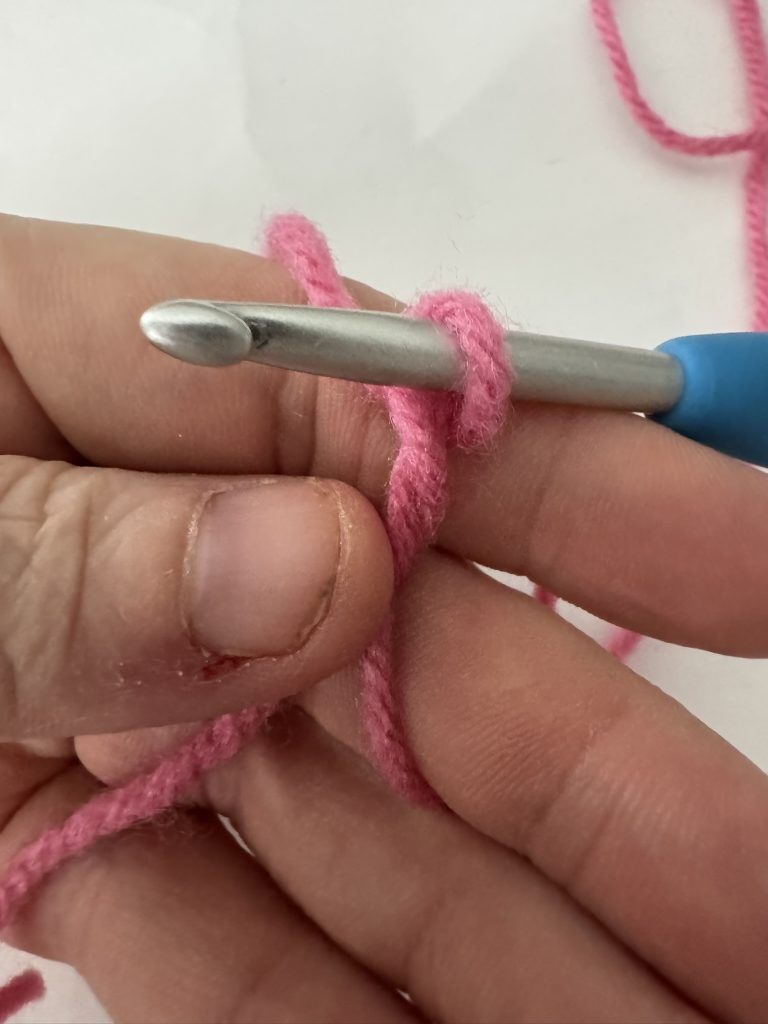
At this point, I like to pinch the loop that I just pulled up to keep it from melting like the Wicked Witch when she meets a cold drink.
Then do a single Chain 1 to hold everything together and lock it in place.
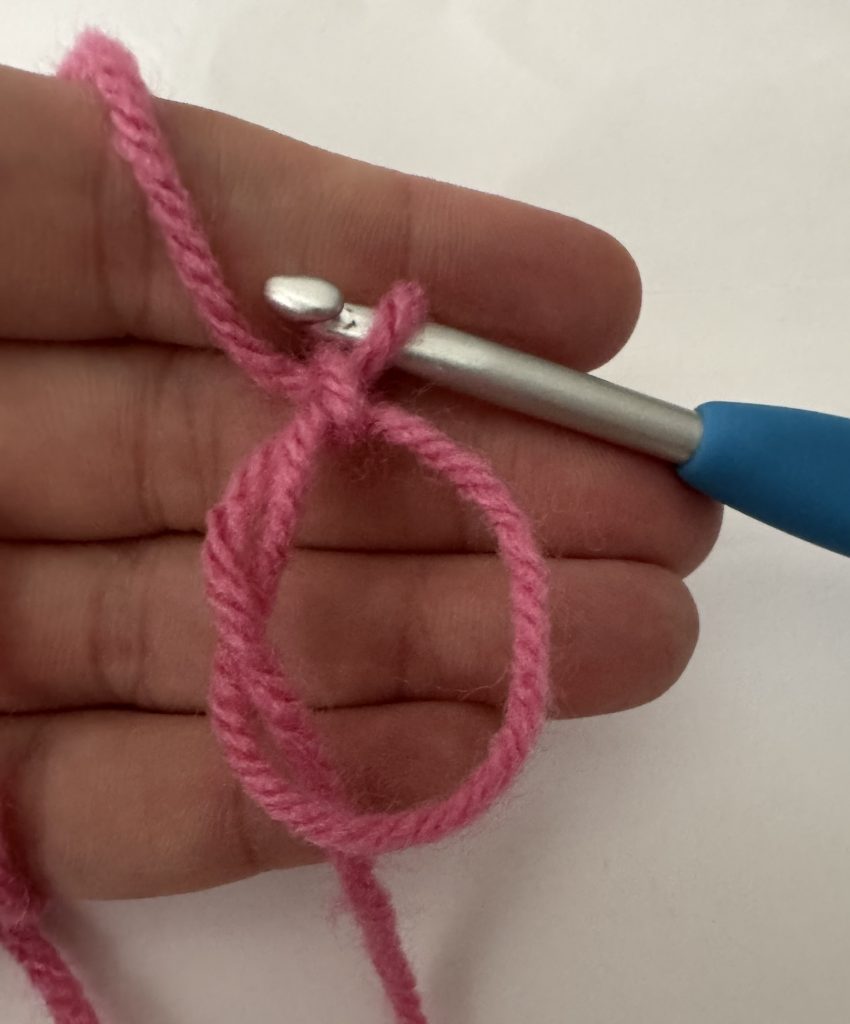
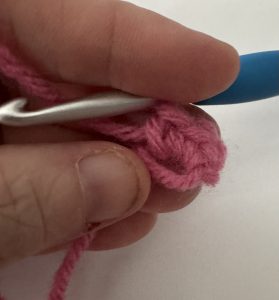
That is literally all there is too it! You can tug on that yarn tail now to adjust the size of the ring when you start crocheting into it. That exact reason is why this is so versatile. If you like making granny squares, this is the way I like to start because I can adjust the size of the hole in the middle.
This is the magic ring with a few single crochet stitches worked into it so you can see what it looks like with real things happening. (The hole in the middle is smaller because I pulled the yarn tail and closed it up)
Now, I understand that it’s still new and confusing.
There’s a lot of pieces of yarn in strange places and your brain is being mean and telling you it’s wrong and you can’t do it. Tell your brain to chill. Then watch the video below that walks you through this.
That way you can see it in real time, but with a pause button when you start having an existential crisis. (This is why the pause button was invented)
What You Can Make With This
Now that you know how to make a magic ring, basically every round project is suddenly on the table. Granny squares start with them.
(I’ve got patterns for a solid granny square, a traditional granny square, and a vintage-style granny square blanket that all use magic rings.)
Amigurumi uses them. Hats use them. Once you’ve got this down, you’re not locked out of patterns anymore. Now when they assume you know this foundational thing, they will be right.
Even some patterns that tell you to ch3 and slip stitch into the first chain, you can sub this technique in and get a much cleaner look. (I literally do this all the time)
Once you’ve learned this, the sky is the limit, but if you need a brush up on some basic stitches, my beginner stitch library breaks down all the foundational stitches without skipping steps or assuming prior knowledge.
And if you’re the kind of person who stares at your project that has exactly twelve stitches finished at 11pm convinced you’ve ruined everything and should just quit – I made a free guide specifically for that exact moment.
It’s called Don’t Panic, and it exists because we’ve all been there spiraling over four wonky stitches that nobody else will ever notice. It’s completely free and you should go grab it.
You’ve got this.
Now, go make something round and be unreasonably proud of it when you’re done.
Happy Hooking!


