
Single Crochet Border Tutorial (Because Your Edges Need Help)
So you finished your project. Congrats! You crocheted the whole thing, wove in the ends, and held it up to admire your work.
And then you noticed the edges.
Maybe they’re a little wavy. Maybe they curl in weird places. Maybe one side looks great and the other three sides look like they’re trying to escape. Whatever’s going on, your project looks almost finished – but not quite, and you find yourself trying to figure out what’s missing. The answer? A border.
Get my free beginner crochet guide (for when your stitches look wrong and you’re convinced you’re the problem – you’re not)
Borders fix an absurd amount of stuff. Edges went sideways? Fixed. One side tighter than the other because your tension had opinions? Evened out. That feeling where you’re holding your project going “…is this done?” – solved.
Single crochet borders are stupid simple. Think one stitch, all the way around. That’s it. But they make wonky edges look like design choices.
Why Actually Bother?
Borders hide mistakes. That edge that decided to curve for no reason? The three extra stitches you added somewhere in row 12? All of it gets pulled into line.
They add structure. Edges have their own personality and ideas. They generally want to just go be nomadic and do their own thing. Adding a border generally whips them into shape and makes them sit down and focus. (Because of course your crochet project has ADHD and needs help!)
They make it look finished. Without a border, people ask if you’re still working on it. With a border, they ask where you got it.
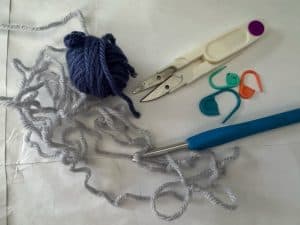
What You Actually Need
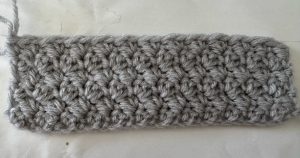
- Your finished project (we’re not discussing the edges)
- Same hook size you used for the project
That’s it. If you can make the project, you already have everything you need for the border.
Where to Actually Start
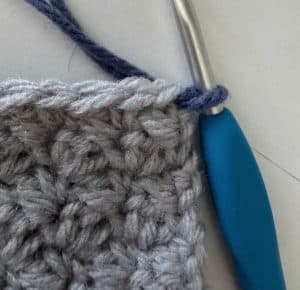
Pick any corner. Seriously, any one. It doesn’t matter which corner you start on because you’re going all the way around anyway.
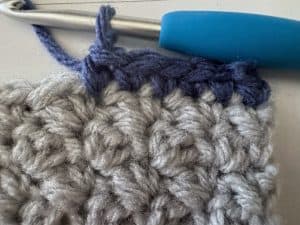
Insert your hook into that corner stitch, yarn over, pull up a loop, chain 1. You have now joined your yarn onto the project.
The Actual Border
Here’s the pattern (and I use that word loosely):
Single crochet in each stitch across the edge.
That’s… it. That’s the whole thing.
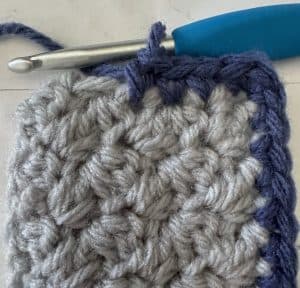
But What About the Corners?
Well, corners need special attention or your project will curl up like it’s having an existential crisis. At each corner, work 3 single crochets in the same corner stitch.
Three is the magic number and here’s a brief reason for it. The first stitch in the corner finishes the row you were just working. The second sc in the corner stitch acts like your turning chain, and the third starts your next side/row. This gives the corner some structure without it curling up on itself or just flopping around like a wet rag.
Working Along Different Edges
The Easy Edge (Tops of Stitches)
If you’re working along the top of a row (where you can see actual stitches), put one single crochet in each stitch. Nothing more complicated than that. But then we get to the sides of your project and it’s not as straightforward.
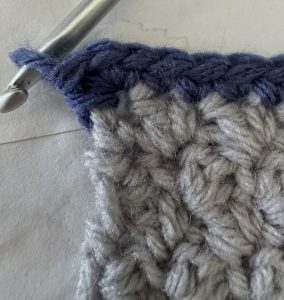
The annoying Edge (Row Ends)
Working along the sides (row ends) is where it gets weird. Generally the spacing along the edges doesn’t work out to allow you to place one single crochet in each stitch like you did on the top row. So this is where you just go by feel.
A Good Rule of Thumb (but not doctrine): Work about 2-3 single crochets every 2-3 rows. I know that’s vague, but it’s really project specific. And it also depends on your tension, your stitch type, and honestly? What looks right. Space them evenly and adjust if you see it bunching up or pulling tight.
This is one of those “you’ll get a feel for it” situations. (I hate those too, but it’s true.) Keep working like this all the way around your project, putting 3sc in each of the corners and placing stitches as evenly as you can on all sides.
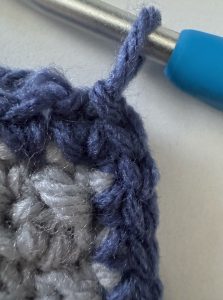
When You Get Back to Where You Started
When you’ve worked all the way around and you’re back at your starting point:
- Work your last single crochet
- Slip stitch into the first single crochet you made (the one right after that chain 1)
- Cut your yarn, (leave a long tail to weave in the ends) and pull it through your stitch to fasten it down securely.
- Weave in those pesky ends with a yarn needle.
Done. Congrats, you have a border.
What If It Looks Wrong?
If it’s ruffling: You have too many stitches. Pull it out and try again with fewer stitches along the edges.
If it’s pulling tight: You need more stitches. Add a few more, especially along those row ends.
If the corners are weird: Make sure you’re doing 3 sc in each corner stitch. More than that = floppy corners. Less than that = the project won’t lay flat.
Multiple Rounds of Border
Want a thicker border? Do it again.
After you finish round 1, chain 1, then single crochet in each stitch around. Still do 3 sc in the corner stitches (which are now the middle stitch of those 3 you did before).
You can do as many rounds as you want. I usually stop at 2-3 because at some point you’re just making a frame.
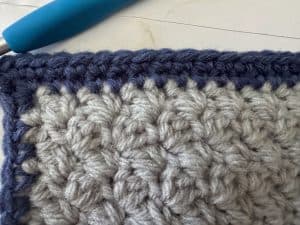
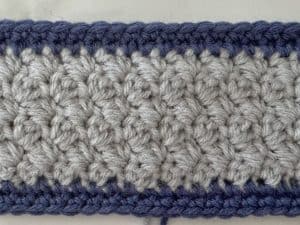
Different Color Borders
Contrasting borders look great and are as easy as the first single crochet round you just did. Just join your new color at a corner when you’re starting the border. Everything else stays the same.

The Single Crochet Border really is just that easy.
Practice Project: Border a Dishcloth
If you want to practice borders without committing to a whole blanket, make a simple dishcloth and add a border. (I’ve got you covered, check it out here!)
Quick Reality Check:
Borders take time. More time than you think they will. If you’re adding a border to a blanket, set aside an evening. Have snacks. Put on something you’ve already watched.
Your first border might not be perfect. That’s fine. The edges might still be a little wonky. That just means it’s handmade – which is the whole point anyway.
The second border you do will be better. The third will be even better. By the fifth one you’ll be doing them on autopilot while helping your kid find their shoes.
Common Border Questions
Do I have to use the same yarn? No. Different colors are always great! However I do recommend you stay with the same yarn weight as the main part of your project to avoid any unnecessary “What is even going on?” moments. Because different weight yarns sometimes don’t play nicely together.
Can I add a border to literally anything? Yes. Blankets, scarves, dishcloths, granny squares, that weird triangle you accidentally made. All of it can be bordered. *Unleash the fury of gathering all the forgotten WIP’s and the start of border adding mania*
What if I don’t want to count stitches? Then don’t. Space them evenly, adjust as needed, call it done. This is handmade – it’s supposed to have character.
My border is wavy, is that normal? No, that means you have too many stitches. Pull it out and try again with fewer.
My border is clenching tightly, what should I do? Honestly, you need to add more stitches and ease up on your tension. The yarn doesn’t owe you money.
Final Thoughts:
You Did It!
Now your project looks finished. Those edges that were doing their own thing? Hidden. The overall shape? More intentional-looking. The whole vibe? Like you knew what you were doing all along. Go you!
That’s what a border does. It’s the crochet equivalent of “fake it till you make it” and it works every single time.
Are you looking for some other border ideas (and maybe a few joining techniques?) Head over to the Techniques & Tutorials page and start exploring.


