I have a confession. I have absolutely no business pretending I have always known how to make this square, because, I haven’t. I’m (almost) as new to this square as you are. But I have been side-eyeing the sunburst granny square for years. (does that count?) Every time one scrolled past me on Pinterest I’d stop, stare, save it to a board, and then go right back to making the same classic granny that had me scrolling Pinterest looking for new granny square ideas to begin with.
Not because it looked hard. (Okay, it looked a little hard.) Mostly because I never had a reason to make one. Then I put together my Scrappy Granny Square Sampler CAL, and I needed a special square for the center of the blanket, and suddenly I was out of excuses.
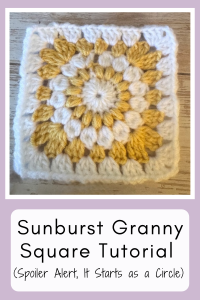
And damn, I get it now. The puff stitches give the center this squishy little texture you want to poke, the clusters fan out around it like rays, and every round brings a new color, so the whole thing looks like a tiny sun going off in the middle of your square. (And me without my sunglasses!)
If you’ve made a classic granny square before, parts of this one will feel like home. Same magic ring start, same four corners at the end. The middle is where it gets fun, with a few special stitches doing all the showing off. (But don’t worry these “special stitches” are really easy once they’re broken down)
It looks stressful, but we’re not going to let yarn intimidate us out of making something cool.
BTW: if one sunburst turns into a whole pile of them (they’re addictive, ask me how I know), I made a free cheat sheet for what to actually do with all those squares. Grab it free right here.
Heads up: My posts may contain affiliate links! If you buy something through one of those links, you won’t pay a penny more, but I’ll get a small commission, which helps keep the lights on! Thanks!
Okay, So What Makes This One Different?
Since I’m basically learning this square right alongside you, here’s what jumped out at me once I stopped staring at the pretty Pinterest picture and actually picked up a hook.
It doesn’t start out as a square. At all. (I mean this is obvious if you look at a picture of it, but for some reason I was still shook. You hear “granny square” and start with a circle? I’m sorry what are we even making??) I’m going to be real with you, for a couple of rounds, you’re wondering if you accidentally started making a mandala pattern. Once round four shows up it brings a mix of short and tall stitches to knock some sense into the cirlce and square the whole thing up. Then your brain exhales and goes “aha!”.
Also something completely annoying but necessary, fastening off your work. A lot. Like after every round. So you might as well make friends with your yarn needle now. (Or crochet over the tails like a feral raccoon. (This is obviously what I did because I’m lazy like that)
Now, if you’ve read any of my other granny square posts, you know I have a whole thing about sorting granny squares into solid ones and holey ones. This one flat out refuses to pick a side. The middle is filled in and cozy, and then the outer rounds open up with those little chain space gaps like a classic granny. (Because your toes need somewhere to go obviously)
So we’re going to just shrug and not try to force this one into a category because we don’t like being boxed in. It simply is what it is. And that would be gorgeous, fun and squishy. Let’s get started.
Before we dig in, here are some helpful links no hunting required:
● My Go-To Supplies – The hooks and supplies I reach for every single time
● Yarn – Because duh
● Stitch Library – A place to brush up on your basic stitches if you need to so the rest of this makes sense.
Free Sunburst Granny Square Pattern At-A-Glance
Skill Level: Brave Beginner
Finished Size: (This sample is 6” square, but you can make it as big or little as you like!)
Materials Needed:
Yarn: A granny square can literally be made from all weights of yarn. However for this specific tutorial we’re going to be using medium worsted weight yarn. I used Red Heart Super Saver in the color cornmeal and white, but you can use whatever you have.
Hook: You can use whatever size hook your pattern calls for, but for this square, we’re using a 5.0mm hook. (H size)
Yarn Needle, Scissors, Tape Measure – To cut yarn, weave in ends, and make sure you got the size you were looking for.
(Babysitter, Netflix, Diet Coke, Snacks) – And a locking door on your bedroom so you can have some much deserved me time.
Time to Make: About 30-45ish minutes once your hands understand the assignment
Making the Sunburst Granny Square:
Stitches Used: Good news first. Most of this square is made with the same basic stitches you already know and love (and if any of these are new to you, they’re all hanging out in my stitch library). The “um…is that a stitch or a typo” news? There are a couple of special stitches in here too. Don’t panic, I promise it’s not that deep because they’re not that complicated. They’re just basic stitches who got a little extra dramatic but we’ll walk through them together. In detail.
- Sl st – Slip Stitch
- Ch – Chain
- SC – Single Crochet
- HDC – Half Double Crochet
- DC – Double Crochet
- TC – Triple Crochet
Special Stitches:
Puff Stitch: Yarn over and insert into stitch, YO and pull up a loop (3 loops on hook). Yarn over again and insert into stitch, yarn over and pull up a loop (5 loops on hook). Repeat one more time and now you have 7 loops on the hook. Yarn over one last time and pull through all 7 loops on the hook. Chain 1 to lock it in place.
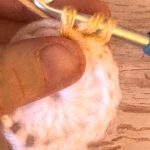
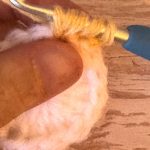
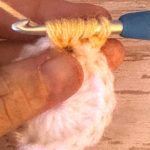
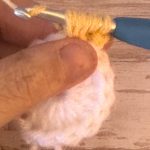
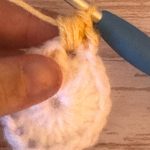
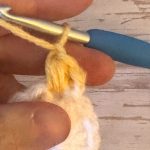
Cluster: Yarn over and insert into the stitch, then pull up a loop. Then pull through 2 stitches (only two not all of them!) Repeat three more times until you have 5 stitches on the hook. Pull through all 5 loops on your hook and ch1 to secure.
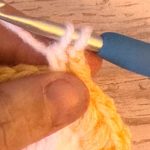
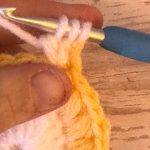
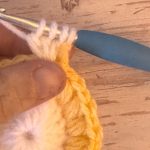
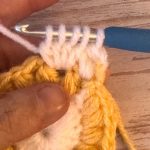
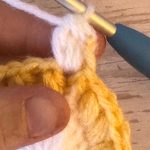
This square starts with a magic ring. If you don’t know how to make one yet, go watch my magic ring tutorial first – otherwise you’re just going to be stuck at step one wondering what you’re supposed to do. (In case you don’t want to learn a new skill right now, you can just ch3 and sl st to the first chain to form a ring. No one is judging you)
To Begin:
Round 1: Starting with a magic ring, chain 2, then place 16 DC stitches in the ring. Sl-st to the top of your first DC and ch1 to secure.
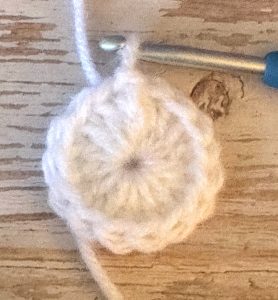
Round 2: If you’re changing colors, you can join in any space you feel like
Change colors, then ch1. Do one puff stitch in the same space, and in each space all the way around. Sl st in the ch1 space (not the beginning puff stitch) and fasten off. (16 puff stitches made)
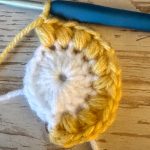
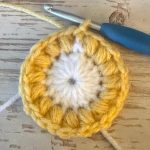
Round 3: Change color, then ch2. Make a cluster stitch in the same space that you are attaching your new yarn into. And continue making cluster stitches all the way around. Sl st in the ch1 space and fasten off. (16 cluster stitches made)
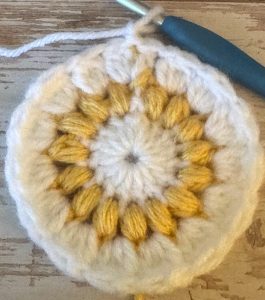
Still with me? Awesome, you’re doing a great job! Now that we have the first three rounds under control, here is where we start to square the whole thing off. Take it one stitch at a time and you’ll get through it.
Round 4: Change color. We’re making our first corner in the same space you just joined color to.
- In that space make your corner by doing (3Tc, ch2, 3Tc) all in the same space.
- In the next space, place 3dc all in the same stitch
- Next space, place 3hdc all in the same stitch.
- The next space, put 3dc in the same stitch
- Then the next space we’re doing our corner again. So do (3Tc, ch2, 3Tc) again all in the same stitch.
You’re going to repeat this pattern all the way around so you can form your corners and sides. Corner (3Tc, ch2, 3Tc), Side (all stitches in the same space (3dc, 3hdc, 3dc) corner.
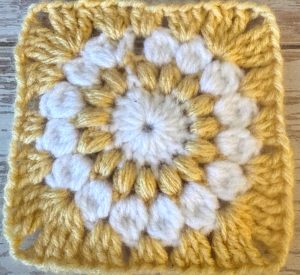
And I know this square is a bit fiddly and I’m a “I have to see it and do it to learn it” kinda girl myself. So I’ve got a video for you that walks you through this stitch by stitch in real time. Pause, rewind fast forward as many times as you need to get it right.
Some “oops” moments to watch out for.
(You’re doing fine, you’re just learning. These are all normal)
Q: My puff stitches look flat and sad instead of puffy. What happened?
A: Your loops are probably too short. Every time you pull up a loop, pull it up nice and tall, about as tall as a double crochet. Short loops make skinny little puffs. Tall loops make the squishy ones you want to poke. (Also pulling the stitch up taller gives you more yarn to work with when you’re pulling your hook through all the loops at the end)
Q: I can’t get my hook through all 7 loops. Is it broken? Am I broken?
A: Neither. Your loops are just hugging your hook too tight. Loosen your grip (your grip, not your standards), keep the loops even, and give the hook a little twist as you pull through. It gets easier by the third or fourth puff, I promise.
Q: My circle is curling up like a bowl. Or ruffling like a potato chip. Which is it supposed to do?
A: Neither one. Lay flat, little circle. Curling usually means you’ve got too few stitches, ruffling usually means too many. Count back to where it started looking weird, rip that sucker out, and try again.
Q: After Round 4 my square looks more like a trapezoid than a square.
A: First, make sure you’ve got all four corners. (It happens. Netflix is distracting.) If your count is right, it probably just needs blocking. A little spritz of water, pin it flat, let it dry overnight, and watch it suddenly remember it’s a square. Granny squares are dramatic until they’re blocked. (or bullied into behaving)
Q: Why are there SO many yarn tails?
A: Because this square changes color every round, and every color change leaves two tails behind. You can weave them in as you go so they don’t pile up into a scary yarn octopus at the end, or crochet right over them like the feral raccoon you are. No judgment. You already know that’s what I do.
Final Thoughts:
So there it is. The square I side-eyed on Pinterest for years, finally off my board and in my hands. And honestly? I don’t know what took me so long. Once those puffs pop up and the clusters fan out around them, you get this little hit of “oh hell yes, I made that” that never really gets old.
Is it the fastest granny square on the planet? Nope. Is it the most fun to watch come together round by round? Most definitely.
Make one in your favorite colors, make one out of the weird leftovers in your scrap bin, make twelve because they’re addictive and you’ve lost all self control. (You’re in good company there) Then come tell me in the comments what colors you went with, because I am nosy and I want to see your sunbursts.
Now go grab a Diet Coke (or your drink of choice, I’m not the boss of you) and get stitching.